Home > Settings tab
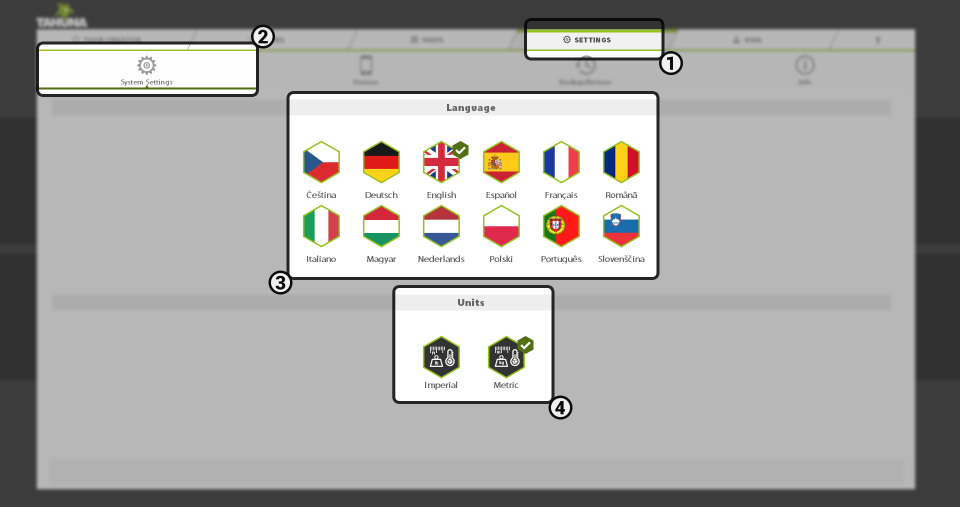
Clicking Settings () will open the System settings tab within (). This lets you select the language () – there are multiple supported languages you can choose from: simply click the one you would like to use and the Tool will instantly change it, displaying a small tick at the top right corner of the flag belonging to the active one.
Scroll further down to see the Units section. You can choose between Imperial and Metric units () – the selected one will be displayed throughout the software. This setting only modifies the measurements within the software, it does not affect your account settings.
Devices tab
READ MORE
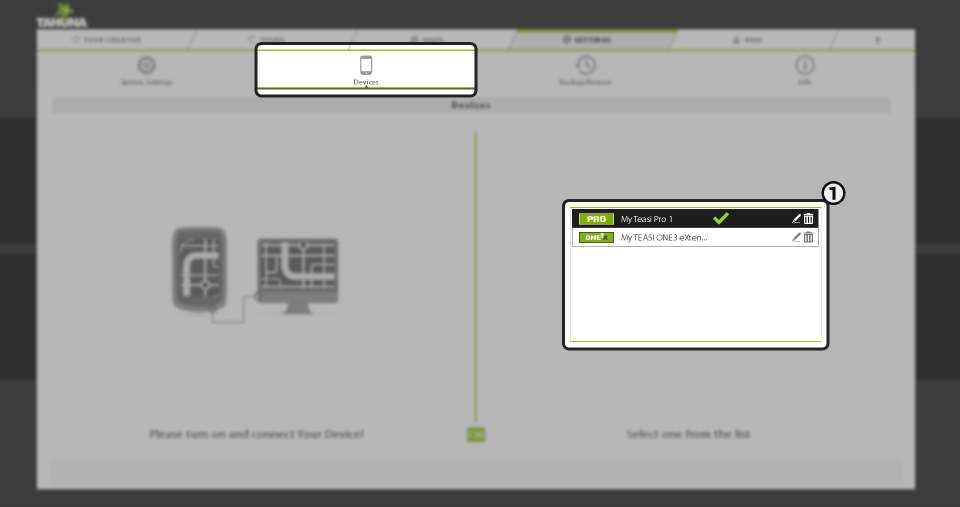
This tab allows you to select the active Teasi device (if you have more than one) (). The active device (see the picture above) will be the one to receive transferred tours/tourbooks/maps within the tour manager.
You can edit a device’s name by clicking the Edit button. To remove a device from the list, click the Delete button.
Connected Teasi devices will be updated automatically upon connection.
Connecting a Device
Teasi devices can be connected to your PC or Mac with the included USB cable. The Tool will automatically recognize compatible devices. There are several device options you can manage using the software.
Device management using the Tool
Connect the device to the computer with the included USB cable (make sure both are powered). The device will ask if you would like to connect it to the computer or just charge it without a connection. Wait for the Tool to recognize the device, and check for updates online.
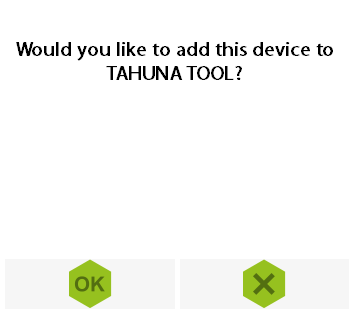
If you are connecting a Teasi device for the first time, a popup will show the text “Would you like to add this device to TAHUNA TOOL?” (see the picture above). Clicking the dismiss button closes the popup with no further action. Clicking ‘OK’ closes the popup and adds the device to the device list.
Software, Map and ROM Updates
When a Teasi device is connected, the Tool checks for software updates and new map/rom versions. This check is only performed with a working internet connection.
If updates are available a popup titled “Available Updates” shows the list of available updates. Clicking ‘Update’ will close the popup and start the updating process. The ‘Dismiss’ button closes the popup.
During an update, you will see an update indicator showing the title and progress of the current download. Clicking the indicator will open the Updates Window.
Updates Window
It has a ‘Dismiss’ and a ‘Cancel updates’ button. Dismissing the popup will close it while the update continues in the background. Clicking the ‘Cancel updates’ button closes the popup and also cancels the update procedure. Updates already installed can not be reverted.
Backup/restore tab
READ MORE
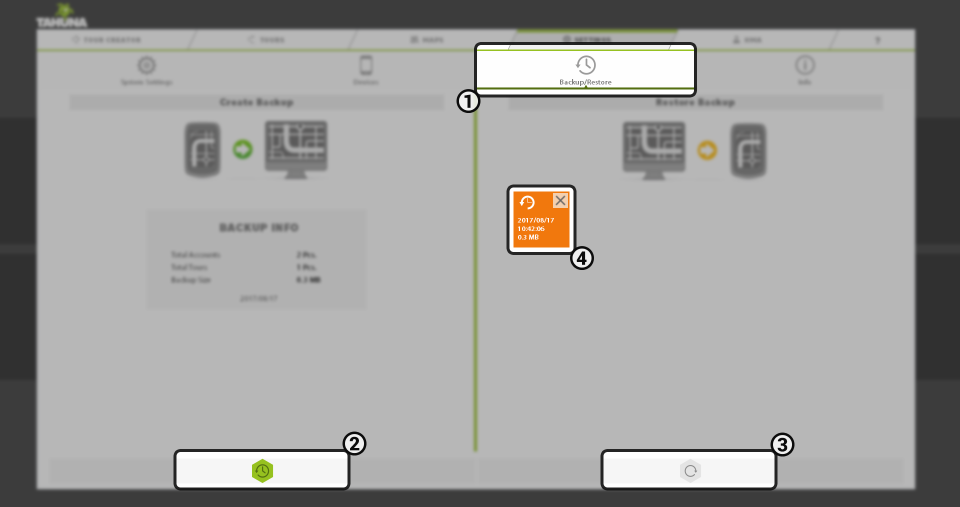
In this tab () you can create a backup of your Teasi device’s memory. In case anything happens to it, you can restore the saved backups and continue using it as it was before being backed up.
To perform a backup, click the Backup button () at the bottom left of the screen (see the picture above). This will initiate the process and prompt you with a message saying “Backup creation finished successfully.” You will see the new backup file (orange) in the right pane showing the date, time and size of the backup.
To restore a backup, select one of the backup files in the right pane (when selected, they turn darker) and click the Restore () at the bottom right of the screen. This action will show a message saying “Restoring the device to an older state will result in a loss of your current data! Continue?”. If you click ‘OK‘, the process begins and the Tool displays a message (“Restoring, please do not disconnect your device.”) with a progress bar.
Please note, that the Teasi device will never be rolled back to an older version. Backing up/restoring only affects the content you created (e.g. recorded tours).
When finished (if successful), the message “Your device has been successfully restored. Please disconnect and restart your device to take effect.” is shown. Follow the onscreen instructions, disconnect and restart your device to activate the restored backup state.
To delete a backup file from the computer, click the ‘X‘ at the top right of the tile (). The message “Do you really want to delete this backup?” is displayed – click ‘OK‘ to delete it or ‘Dismiss‘ to cancel the operation.
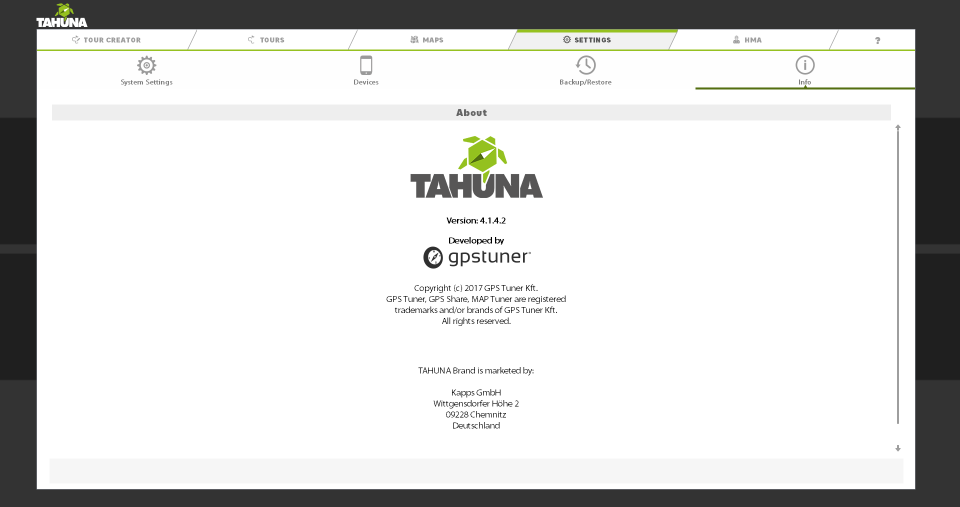
Info tab

