Home > Settings
Use the tabs to navigate the page – just as you would within the app!
To access the ‘Settings’ screen, tap the button shown above at the lower left part of the Main menu.
Within Settings, you can set the basic parameters of the application. Some of them you had previously set during registration.
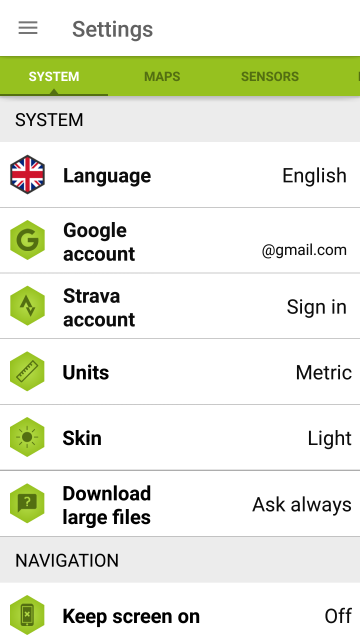
On the first tab you will see the system and navigation settings. You can modify the system settings in dialogue boxes or drop-down menus, whereas the navigation options are toggle buttons, so they only have on/off functionality. To access a menu simply tap on the desired parameter.
Language: You can choose the language you wish to use throughout the app.
Google accounts: If you have mupltiple Google accounts, you can swith between them by tapping the Google account button. You can also add new accounts. To change the active account, tap on the desired one and select OK to proceed.
Strava account: If you have a Strava account, you can pair it to your Tahuna account and upload your workouts. You can further manage your uploads within the Strava mobile application or the website.
Units: Measurement units can be set to ’metric’ or ’Imperial’.
Skin: You can set the tone of the application whether to be Light or Dark. You can also set it to Automatic mode. In this case, the application will change the tone according to the time of day. The Dark option should enhance visibility and put less strain on your eyes at darker hours.
Storage: The application is able to record your data and tour information. If you have a memory card installed, you can choose whether this information should be saved to the phone’s internal storage or to the SD card.
Download large files: The application has to download large files from time to time (updates, map packs, etc.). You can set whether this should only happen while connected to a wi-fi network, or it could use mobile data too. It can also be set to ask for permission before each download.
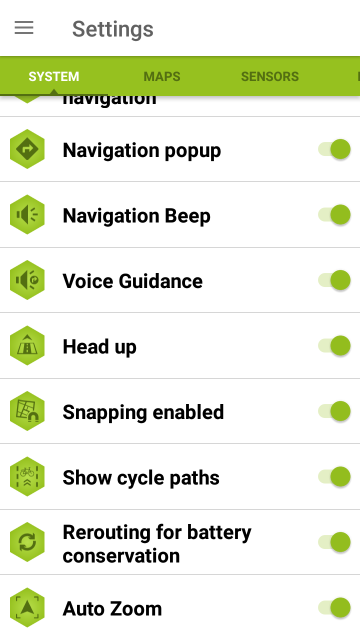
There are several other options – don’t forget to scroll down so you don’t miss any of them!
Keep screen on – app will prevent the phone from sleeping during navigation/always.
Navigation popup – the upcoming instructions will pop up in every menu.
Navigation beep – a beeping sound will alert you before upcoming events.
Voice guidance – a voice will read out navigation instructions on the go.
Head up – the map will ’’follow’’ the cursor wherever you go.
Snapping enabled – cursor will be snapped to the road network (does not affect recorded route).
Show cycle paths – cycle paths will be visible on the map.
Rerouting for battery conservation – the route will be optimized to extend battery life.
Auto zoom – the map will automatically zoom in/out depending on your speed.
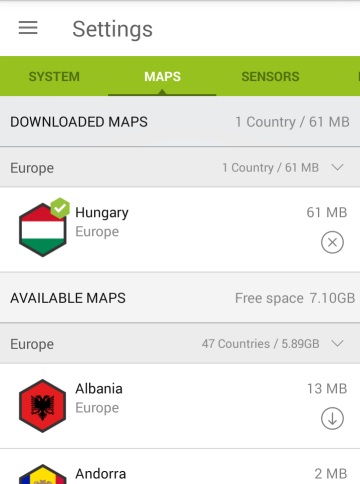
The ‘Map management’ screen is the second tab in the Settings menu. You can download maps of countries you are interested in. These maps will add additional information to the base map you downloaded upon first start.
If you have skipped registration, the app will only allow you to download one offline map. After completing the registration process, you can download an unlimited number of maps.
In case a new map update is available, the application will notify you via a toast on the Map screen and a constant message within the header of this tab. You can apply the update using the button in the notification bar.
This screen unlocks with the purchase of the ‘Fitness package’, or along with redeeming the Teasi Core or StatCap hardware packages. Please, refer to the articles within the Shop category in the documentation.
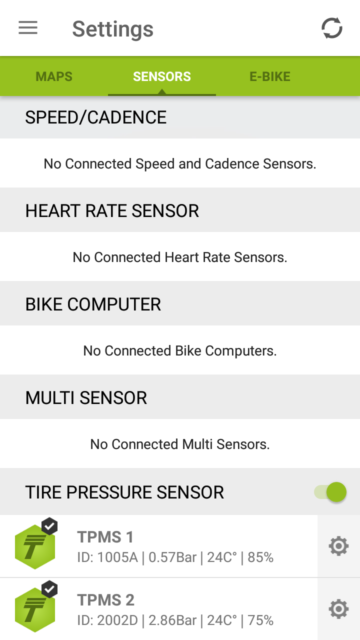
This menu allows you to manage your sensors and bike computers. Switch on Bluetooth to pair the compatible accessories.
To add a new sensor, tap the Add new sensor button at the bottom of the screen. The application will begin searching for nearby Bluetooth sensors and list them on the screen.
Tap the device you would like to connect to. This will move the device to the ‘Known sensors’ list and will remain there even when it is disconnected. To connect to the device, tap the text that says ‘Disconnected’.
The application will try to connect automatically to sensors in the ‘Known sensors’ list. This is useful when you leave the range of the connected device and then get back in it: the app will reconnect automatically without having to complete the process manually.
Since there is no direct Bluetooth connection between the StatCap sensor and the app, the active sensors are indicated by a checkmark.
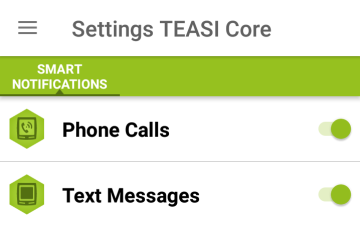
If you connect a Teasi Core bicycle computer, you will be able to update its software from this list. The app will notify you with a pop-up message – if you choose to cancel it, you can come back to this screen and tap the circular arrow button to perform the update.
If your phone is running Android 6.0 or newer, the Teasi Core can be set to notify you about incoming calls and messages on its own screen. You can modify these settings by tapping the gear icon to the right of the Teasi device (thins function requires permissions for your contacts and messages).
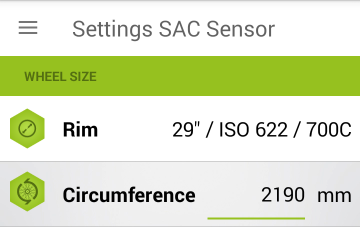
In this example, you can see the settings of a speed and cadence sensor. You can modify the parameters according to your bicycle’s properties to ensure correct data display while riding. To do so, tap the field which you would like to modify and select the appropriate option/input the correct values on the number pad.
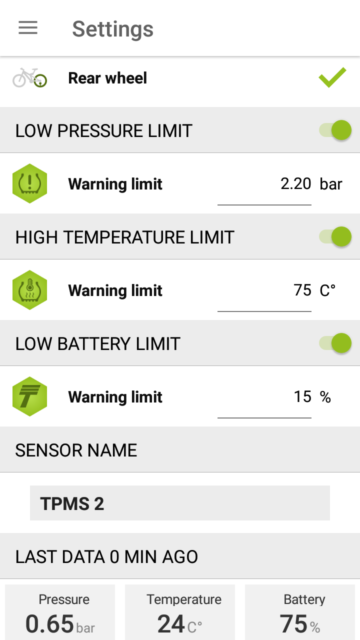
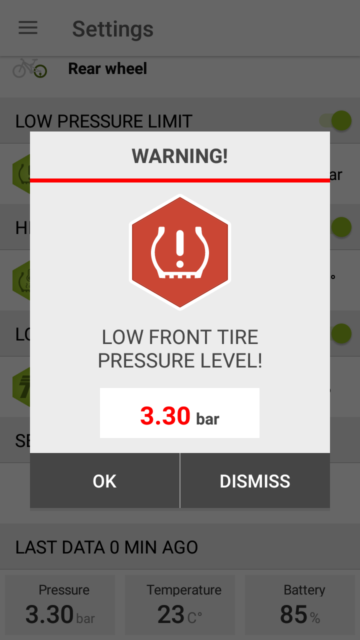
In the Settings of the StatCap sensor, you have the option to set limits for different alerts:
- Low tire pressure limit
- High tire temperature limit
- Low StatCap battery limit
You can hide the alert popup in two ways:
- Dismiss – The alert will not re-appear
- Close – The alert will re-appear periodically
On this screen, you also have the following options:
- Modify the location of the installed sensor
- Rename the sensor
- Check the most recent data communicated by the the sensor
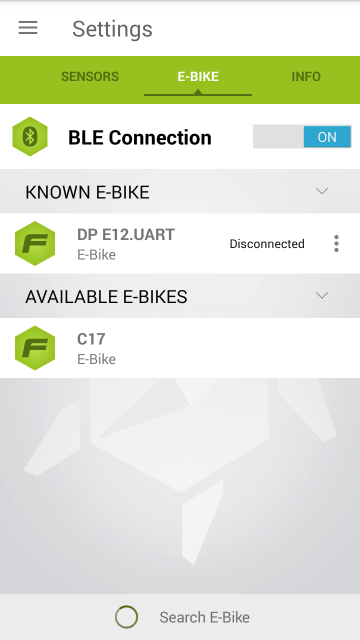
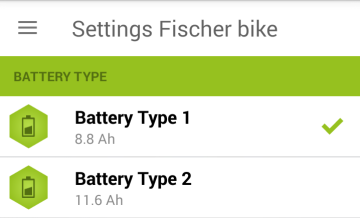
If you have an E-Bike, you can pair it to the phone using this screen.
To add a new E-Bike, tap the Add new E-Bike button at the bottom of the screen. The application will begin searching for nearby bikes and list them on the screen.
Tap the bike you would like to connect to. This will move said bike to the ‘Known E-Bike’ list and will remain there even when it is disconnected. To connect to the device, tap the text that says ‘Disconnected’.
The application will try to connect automatically to sensors in the ‘Known E-Bike’ list. This is useful when you leave the range of the bike and then get back in it: the app will reconnect automatically without having to complete the process manually.
To access its settings, tap the Options button that belongs to your bike at the right side of the screen.
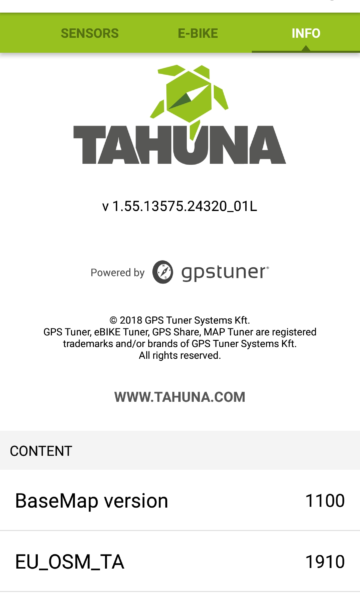
The INFO tab provides you with some core information about the application. This includes the version number of the software and the version of the downloaded maps.
You can also access the EULA from this screen by tapping the paragraph icon in the top right corner of the screen.
